
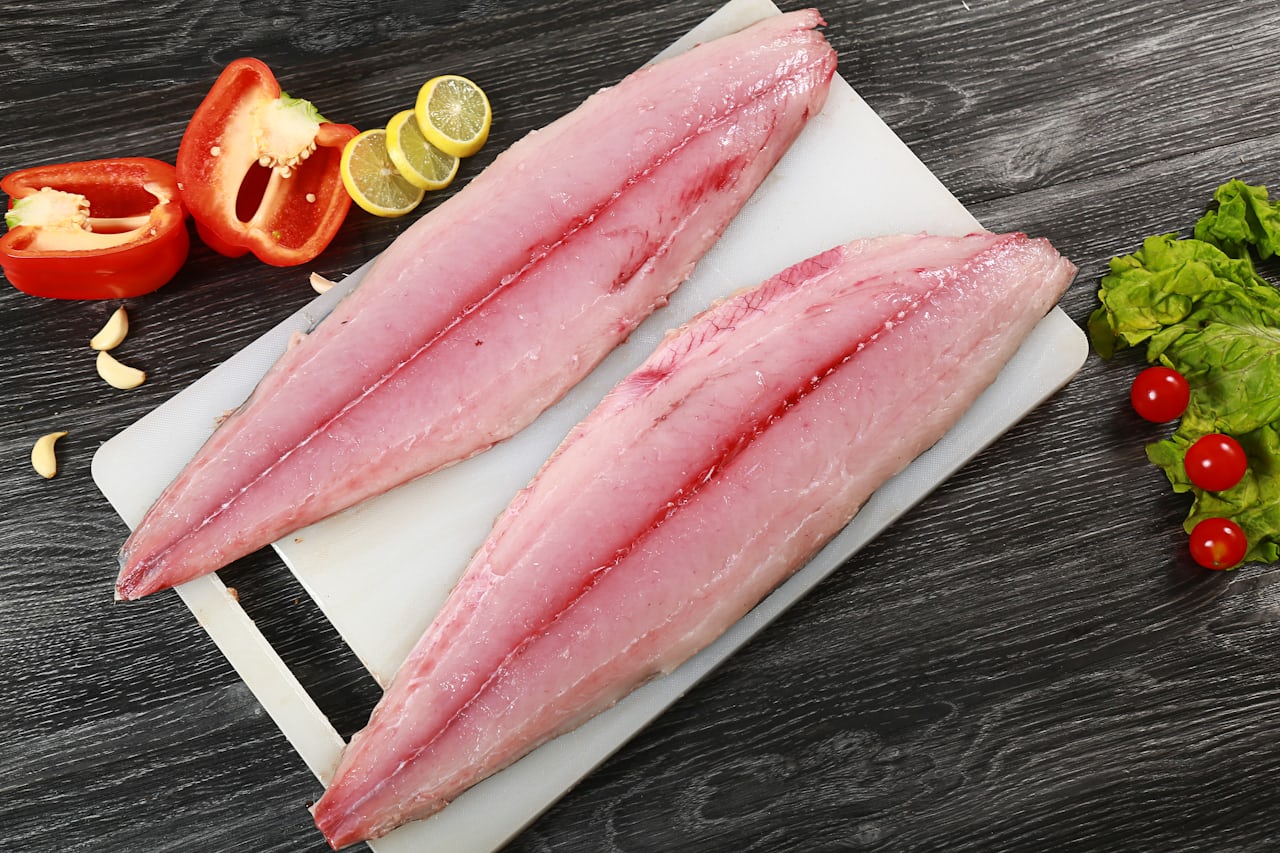
The hard part is over. You found the fish, you got the bite, and the cooler is heavier than it was this morning. Now comes the part that decides whether dinner is memorable or merely edible — and most anglers give it about a tenth of the attention they gave the cast.
This is the whole back half of the day: what the law says before you pick up a knife, how to keep fish from going soft in the box, how to actually get clean fillets off a Florida fish, how to store what you don’t eat tonight, and three cooking methods that never miss.
Before You Cut: Florida’s Whole-Condition Rule
This one costs people real money every year, and it is entirely avoidable.
FWC publishes landing requirements species by species, and for many Florida species the rule is that the fish must remain in whole condition until it is landed ashore — head and tail intact — so an officer can identify the species and measure it. You can ice it, gut it, gill it and scale it on the water. You cannot fillet it, and you cannot cut the head or tail off, until the trip is over and you’re back on land.
Red drum is the clearest published example. FWC’s red drum page states the fish “must remain in whole condition until landed ashore,” and adds a “4 fish per person transport limit” that applies when you’re travelling in a vehicle on land away from the fishing site. (Verified against myfwc.com on 21 August 2026.)
Two honest caveats, because this trips people up:
- Not every species page carries that line. King mackerel’s FWC page, for instance, lists a 24-inch fork-length minimum, bag limits and legal gear — but no whole-condition language. The rule is not uniform, so don’t assume.
- Federal waters have their own rules, and some species carry filleting exemptions that state rules don’t.
So check your species before you cut. The season and limit checker below pulls current FWC size, bag and season data — switch the species dropdown to whatever’s in your box. When in doubt, land it whole. It costs you nothing.
And measure before you keep, not after. A fish that’s a half-inch short is a citation whether or not you meant it, and once it’s filleted you have no way to prove anything.
Ice Beats Everything: Care From Hookset to Cutting Board
Ninety percent of “this fish tasted muddy” is not the fish. It’s the four hours it spent at 80°F in a cooler with three cubes rattling around the bottom.
Fish flesh starts degrading the moment the fish dies, and it degrades fast in Florida heat. The fix is unglamorous:
- Bleed it. Cut the gill arches on one side and let it bleed out in the water or in a bucket for a minute before it goes on ice. This matters most on mackerel, jacks, bluefish and anything else with dark, blood-rich flesh — it’s the single biggest flavour improvement available to you, and it takes ten seconds.
- Ice slurry, not ice cubes. Half ice, half seawater. A slurry contacts the whole fish and drops its core temperature in minutes; loose ice cools whatever it happens to be touching. Aim for roughly a 2:1 ice-to-fish ratio by volume and start the day with more ice than you think you need.
- Don’t let it swim in meltwater. Drain the cooler periodically, or keep fillets in a sealed bag inside the slurry. Fresh water leaches flavour and turns flesh mushy.
- Kill the stringer habit. A fish on a stringer in warm shallow water is a fish that’s cooking slowly, plus a reliable way to donate it to a shark.
If you’re fishing from the beach or a pier where you can’t run a big cooler, this is the one place to spend money — a well-insulated cooler that holds ice through a Florida afternoon does more for your dinner than any knife will.
The Basic Fillet, Step by Step
One technique covers the great majority of Florida fish — snapper, grouper, seatrout, redfish, sheepshead, mackerel, cobia. Learn it once.
- Sharpen first. A dull knife tears flesh, wanders off the bone, and is far more likely to cut you because you push harder. This is non-negotiable.
- Cut behind the gill plate, angled slightly toward the head, down to the backbone. Don’t cut through it.
- Turn the blade toward the tail and run it along the spine in one long, smooth stroke. Let the blade ride the bones — you should feel and hear the rib cage clicking under it. Long strokes, not sawing.
- Work over the ribs. Either lift the fillet and slice the rib bones away as you go, or cut straight over them and trim the rib section off afterward. The second way is easier to learn and wastes a little more meat.
- Flip and repeat.
- Skin it. Lay the fillet skin-side down, start at the tail, get the blade between skin and flesh at a shallow angle, then pull the skin while keeping the knife nearly still. The skin does the work, not the blade.
The single most common beginner error is a knife angle that’s too steep — you end up leaving a quarter-inch of meat on the frame. Angle the blade slightly down into the bones and you’ll take almost everything.
Skinning, bloodline and pin bones
The bloodline is the dark strip of muscle running down the centre of the fillet. On mild fish like snapper and trout you can leave it. On mackerel, jacks, cobia and bluefish, trim it out entirely — that’s where the strong, oily flavour lives, and removing it converts a fish people complain about into a fish people ask for.
Pin bones run in a row down the upper third of the fillet on many species. Run a fingertip along the fillet to find them and pull them with needle-nose pliers, or simply cut a shallow V and lift the strip out.
Species Quirks Worth Knowing
| Species | What’s different |
|---|---|
| Mangrove snapper & other snappers | Thin, delicate skin and sharp gill plates. Standard fillet, but wear a glove — snapper cut hands more than any other inshore fish. |
| Grouper | Thick, tough skin that dulls blades fast. Many people fillet grouper skin-on and remove it last with a fresh edge. Big grouper are worth steaking rather than filleting. |
| Flounder | Flat, so it yields four smaller fillets — two per side, either side of the centre line. Cut down the midline first, then work outward. |
| Sheepshead | Heavily armoured, with a rib structure that fights you. Slow down and expect a lower yield. The meat is worth it. |
| Spanish mackerel | Bleed on the boat, ice hard, trim the bloodline aggressively. Handled well it’s excellent; handled badly it’s the reason people say they don’t like mackerel. |
| Hogfish | Arguably the best-eating fish in Florida and very forgiving. Simple fillet, skin off, don’t over-season it. |
Shellfish play by different rules entirely — see our bay scallop and lobster mini-season guides for those.
Storing It: Vacuum Sealing, Freezing and How Long It Really Keeps
Fresh fish in the refrigerator is good for about two days. After that the texture goes, regardless of what it smells like.
For anything you’re not eating within two days, vacuum sealing is the difference between fish that tastes like fish in March and fish that tastes like the freezer. Air is what causes freezer burn; removing it removes the problem.
- Dry the fillets with paper towel before sealing. Wet fillets defeat the seal and most home units struggle with liquid at the seam.
- Portion for how you actually cook. Two fillets per bag beats one giant bag you have to thaw entirely.
- Label with species and date. Every unlabelled bag becomes “some kind of white fish, sometime last year.”
- Lay bags flat to freeze, then stack them. They freeze faster and store in a fraction of the space.
Vacuum-sealed and properly frozen, lean white fish — snapper, grouper, trout, sheepshead — holds quality for six to eight months. Oily fish like mackerel and bluefish is a three-month proposition at best; eat that fresh.
Thaw in the refrigerator overnight, or in the sealed bag under cold running water if you’re in a hurry. Never on the counter, and never in the microwave.
Three Ways to Cook It That Never Miss
You caught it. Don’t bury it under sauce.
1. Pan-seared, hot and fast. The default for snapper, grouper, hogfish and trout. Dry the fillet thoroughly, salt it, get a heavy pan properly hot with a high-smoke-point oil, lay it in skin-side down (or presentation-side down if skinless), and leave it alone for three to four minutes. Flip once, one to two minutes, finish with butter and lemon. The mistake is a pan that isn’t hot enough and a fillet that isn’t dry.
2. Blackened. Built for redfish and mackerel — assertive spice suits assertive fish. Cast iron, as hot as your kitchen ventilation tolerates (outside on a burner is better), butter-dipped fillet, heavy blackening seasoning, two to three minutes a side. If it isn’t smoking, it isn’t blackening.
3. Grilled whole or in foil. The move for a fish you’re allowed to keep whole, and for anything delicate. Score the sides, stuff the cavity with citrus and herbs, oil the grates well. For flaky fillets, a foil packet with butter, lemon and a splash of white wine at medium heat is close to foolproof.
A rule that holds across all three: fish is done sooner than you think. Pull it at 130–135°F internal and let carryover finish it. Flesh should just barely flake and still look slightly translucent at the centre. The difference between perfect and chalky is about ninety seconds.
The Gear That Actually Matters
Four things do almost all the work. Everything else is optional.
- A proper fillet knife. Flexible, thin, 7–9 inches for most Florida fish. The Dexter-Russell Sani-Safe 9″ with sheath is the knife you’ll find on more Florida cleaning tables than any other — inexpensive, easy to sharpen, and built for commercial-volume use.
- An electric fillet knife if you clean numbers of fish. When you’ve got a limit of mangrove snapper to get through, it turns an hour into fifteen minutes. The BUBBA Li-Ion cordless is the common recommendation — cordless matters at a dock cleaning station with no outlet.
- A cut-resistant glove. Genuinely the highest-value item on this list. Wet fish, sharp blade, sharp gill plates. A Level 5 cut-resistant glove costs less than an urgent-care copay.
- A vacuum sealer. If you keep fish more than a few times a year this pays for itself in one season of not throwing away freezer-burnt fillets. The FoodSaver VS2150 has built-in roll storage and a cutter, which is the feature that determines whether you actually use it.
Best paired with: a dedicated cutting board that never touches vegetables, and a cheap sharpening steel you use before every single session rather than once a season. If you’re still building out the rest of the kit, our gear guides cover the on-the-water half — and the grouper tackle guide covers what it takes to get one in the boat in the first place.
Bottom Line
Check the rule for your species before you cut, and land it whole if you’re unsure. Bleed it and get it into an ice slurry immediately — that’s most of the flavour battle right there. Use a sharp knife, ride the bones, trim the bloodline on anything oily. Vacuum-seal what you’re not eating in two days. Then cook it hot, fast, and less than you think.
Do those five things and an average fish beats a great fish that was handled carelessly. Every time.
Not sure what you’re allowed to keep in the first place? Our FWC season and limit checker covers 22 Florida species, and the species guides cover how to catch each one. New to Florida saltwater generally? Start with the beginner’s guide to inshore fishing.
Want someone to clean your catch for you? Most Florida charters do it as a matter of course — browse Florida charters on FishingBooker and confirm when you book. See the regions hub to work out where you want to fish.
Disclosure: some links here are paid. Buy or book through one and we earn a commission at no extra cost to you — it never affects which gear or captains we recommend. As an Amazon Associate we earn from qualifying purchases.